Iggle Piggle Cake

Iggle Piggle Cake

Iggle Piggle Cake

Iggle Piggle is a character in BBC children’s show called ‘In the Night Garden’. The last ‘new’ episode aired in 2011 however abc4kids has been running reruns for a while.

My younger Miss G, loves the show and has taken over her sister’s Iggle Piggle rag doll to sleep with. For her 2nd Birthday, I had originally decided to make a simple butterfly cake, however, after seeing a book – ABC Book of children’s cake, I was inspired to try Iggle Piggle. I did not buy the book. There are numerous Iggle Piggle cakes on the internet. Different shapes, 2D, 3D, flat, sitting up or just cake toppers. I decided on a flat, semi 3D cake, an Iggle Piggle laying on his back.

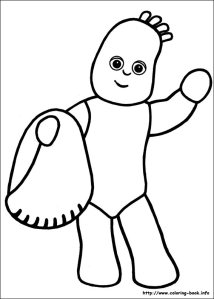
Cake used is my white chocolate mud cake. The pan is a rectangle non stick 37cm x 26cm (approx 14.5in x 10.2in) roasting pan which I use for my bigger cakes. I searched for an Iggle Piggle image that I liked as template. I downloaded this image from coloring-book. I printed on a larger scale then cut the pieces and added an extra 1cm (approx 0.39in) when cutting the cake.

Iggle Piggle Template

Iggle Piggle Template

I cut out each body part so in the end I had 6 pieces to stick together. I covered the cake in white chocolate ganache and then covered the cake in fondant. Iggle Piggle requires 2 shades of blue for his body, red for his blanket and the three tops on his head, some white for his eyes and a bit of black for his eyes and mouth. Keeping the ganache on without chilling the cake was hard. It feels like we have had constant heat wave since December, 2014.

Iggle Piggle Almost Done

Iggle Piggle Almost Done

Though my toddler loved her Iggle Piggle, there was a look of horror on her face when I cut a piece and gave her, her beloved Iggle Piggle to eat.

Smurf Garden Cake

Smurf Gaden Cake

Smurf Gaden Cake

This is one of my birthday cakes that my husband made in 2013. I have been going through my pictures I had put aside for blogging and this came up. We had fun making this cake. He is not a decorator. He can bake. The decorating is normally passed on to me.

I asked for a Red Velvet Cake with Cream Cheese boiled icing. Now, one of my earlier posts has a Red Velvet Cheesecake and the recipe calls for 1/4 cup red food colour. This recipe relies mostly on the reaction between baking soda (bi carb) and cocoa powder and only requires 6 drops of colour. The book has a Beet Red Velvet Cake variation where beetroot is required instead of food colour.

The cake recipe is from A World of Cake by Krystina Castella. We tried to make the Cream Cheese boiled icing but the mixture split so we used chocolate frosting from Betty Crocker.

Red Velvet Cake as shown in the recipe book

Red Velvet Cake as shown in the recipe book

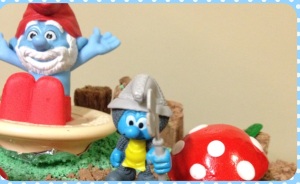
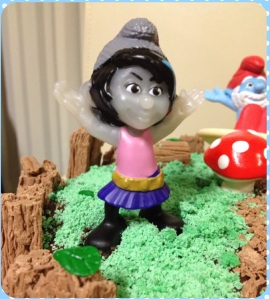
Some of the toys are from McDonalds Happy meal that could be bought separately for $2 each. The green grass is grated Wilton’s green melts. The logs all round are Cadbury Flake. The smaller smurf is standing on a Cadbury Crispello. The mushrooms and the scattered green leaves are made of marshmallow fondant.

Papa Smurf

Papa Smurf

Vexy

Vexy

The cake was delicious. My girls loved it.

Double Chocolate Cheesecake with Strawberries

Pick your Own - Strawberries

Pick your Own – Strawberries

Strawberry season starts in Queensland in May and goes on until October. From about late June – early July, some of the farms start offering Pick Your Own or PYO. Members of the public visit the actual strawberry patch and go throw the plants and pick the berries. It is a fun experience, especially for the little members of the public. Strawberry ice-cream at the end of the trip was a consolation for ours.

Strawberry field

Strawberry field

Strawberries

Strawberries

Last year (2013), we visited near the end of the season. There was still plenty of fruits on the ground hugging shrubs. We went to Berry Patch at Chambers Flat. The fruits were warmed up by the sun and delicious. I have not seen such big fruits in the supermarket. I realised, after we put leftover ones in the fridge, they shrink.

We did not want ours to go bad so we decided to make a cheesecake, one that we had seen a few months back and had been thinking of making.

The cheesecake recipe for Triple Chocolate Cheesecake was published in Better Homes and Garden Australia’s April 2013 magazine. It was the first western cheesecake that I came across that was baked in a bain-marie. Previously, I had only come across this technique in Japanese cheesecake making. It gives a more even cooking and the cake does not dry and develop cracks like some baked cheesecakes are prone to do.

We made a few changes to ours to use the strawberries.

Instead of using the last layer of chocolate ganache as frosting, we cut thin slices of the fresh strawberries and spread them on the baked cake. We then made some strawberry flavoured jelly and poured it over the strawberries. I thought it tasted good so did the church the next day.
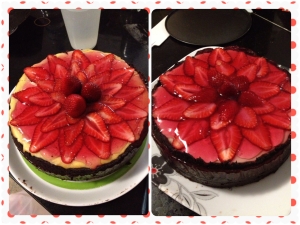
Strawberry Cheesecake

Strawberry Cheesecake

Here is our adjusted recipe, adapted from Better Homes and Gardens Australia, April 2013

Ingredients

Cooking oil spray, for greasing
375g butternut biscuits
60g dark cocoa powder
125g unsalted butter, melted
1 eggwhite
500g cream cheese
100g caster sugar
3 eggs
2 Tbsp cornflour
1 tsp natural vanilla extract
300g sour cream
200g white chocolate, melted, cooled
1 punnet strawberries
1 packet of strawberry jelly mix

Method

1. Preheat oven to 150°C. Grease a 22cm springform cake tin with cooking oil spray, then line base and side with baking paper. Put biscuits and cocoa in a food processor. Pulse until mixture resembles breadcrumbs. Add butter and eggwhite and pulse until combined.

2. Press biscuit mixture into base and up side of prepared tin. Put in freezer for 10 minutes to firm up.

3. Put cream cheese, sugar, eggs, cornflour and vanilla extract in a food processor and pulse until smooth, scraping down side of bowl several times. Add sour cream and process for 30 seconds. Add white chocolate and process for 2 minutes or until smooth.

4. Pour white chocolate mixture into tin. Wrap outside of the tin with 2 layers of aluminum foil. Secure the foil. Put tin in a baking dish and fill with water to come halfway up sides of tin. Bake for 1 hour. Remove tin from water bath. Set cheesecake aside in tin to cool completely.

5. Cut thin slices of the strawberries then arrange them on top of the cake.

6. Mix the jelly according to the instructions on the packet with half a cup less water. Cool down then pour over the cake. Put the cake in the fridge for the jelly to set.



Garfield Birthday Cake

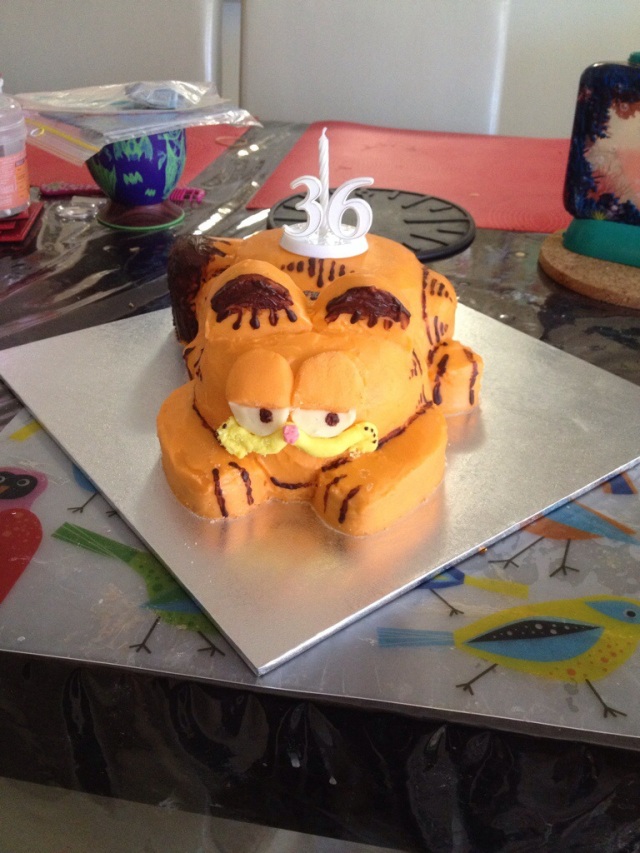
This year, I asked my husband to choose what he would like for his birthday. He wanted a cat cake. Later he told me, he thought I was just going to get the cat cake from the Japanese bakeries around here. I, instead, had decided it was going to be a Garfield cake. His request also was no fondant.

20140717-215448-78888785.jpg
The hardest thing was deciding how I will make a 3D garfield.
There is no shortage of cake pans on EBay but I did not want to buy a pan and not use it again. I have a bit of a storage issue.
After searching for days, I found a website that gives carving instructions but it’s in Korean. I was lucky, it has step by step pictures.
I had decided in the beginning that the cake will be Jaffa. Orange flavoured chocolate cake. Initially I wanted the inside to be chocolate and the buttercream to be orange but birthday boy did not like that idea. I started searching and found a very delicious Jaffa marble buttercake. Oh that marbling.

20140717-221639-80199995.jpg
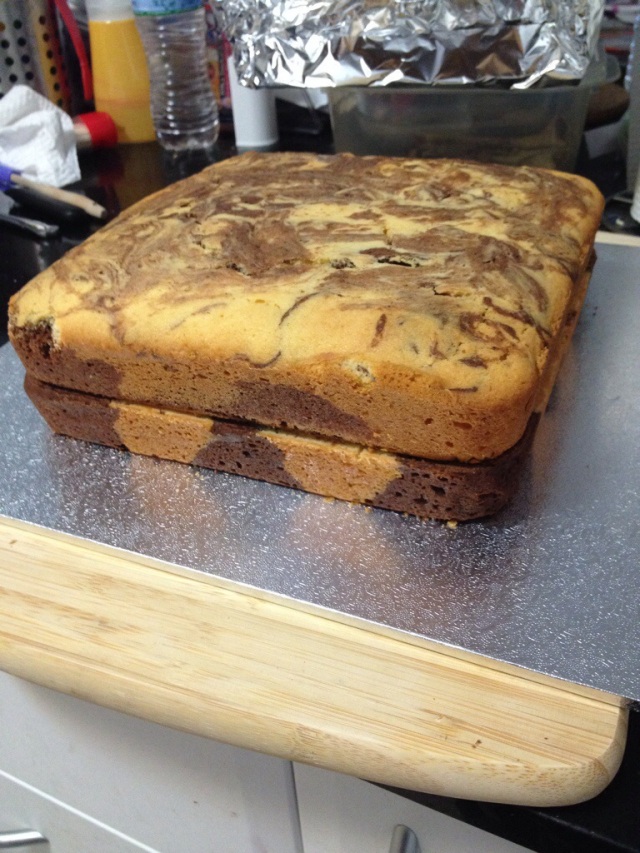
I made double the recipe to get 2 x 9″ square cakes. Somewhere, on the internet, I had read, it is easier to carve a cake if it has been cooled in the fridge. There is less crumbs as well.

The cake was covered in white chocolate ganache which I tinted orange. The ratio I used was 3:1 so by weight 1290g white chocolate to 430g thickened cream. (Not millilitres but grams)
Here are pictures from 2 square cakes to a Garfield cake.

20140717-222538-80738824.jpg
2 square cakes with just a touch of ganache to keep them together.

20140717-222540-80740411.jpg
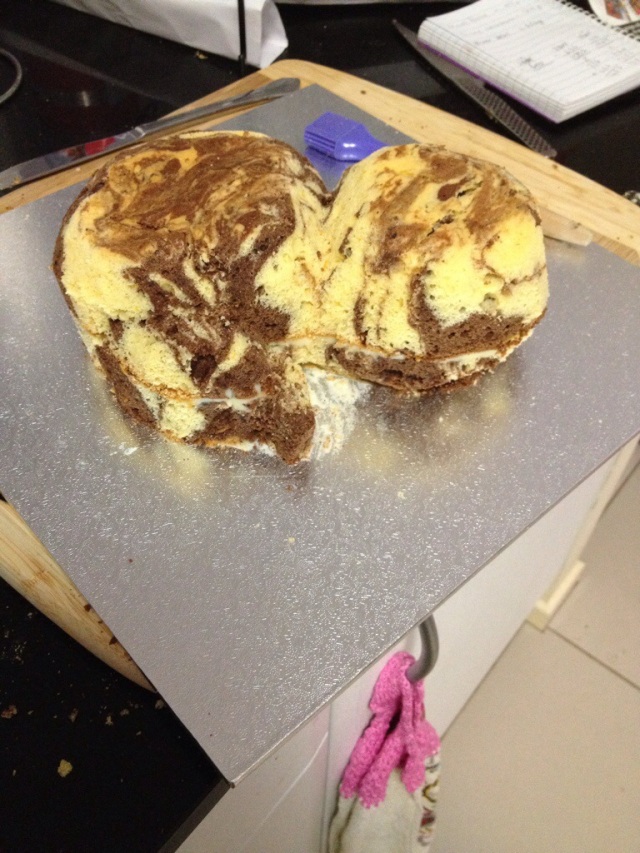
The template was made using 2 circles joined by a curve on either side. I placed the template diagonally so I could use the tips on either ends as ears. The cutoff sides came in handy making the front paws and the tail.

20140717-222542-80742058.jpg
I carved the hind legs as part of the main cake.

20140717-223613-81373618.jpg
First coat to seal the crumbs

20140717-223616-81376540.jpg
2nd coat. I put the cake in the fridge for about 10minutes after the 1st coat to cool it quickly. The ganache for 2nd coat was almost runny but the cold cake was hardening it quickly.

20140717-223618-81378773.jpg
The brown markings was painted on with melted dark chocolate.

Checkerboard Cake

I had bought Wilton’s checkerboard cake pan kit on sale from a kitchen warehouse in July. Since then, my older daughter had decided, we were going to make one of the ideas shown on the box for the next few occasions. I chose Celebration Confetti for my baby’s 1st birthday.

20140706-215720-79040802.jpg

I did not want to use fondant so I used Betty Crocker’s Delux Vanilla Frosting. The decorations, the little spots and the twirls, are marshmallow fondant. The spots could easily have been substituted with M&M’s or Smarties.
The inside of the cake is pink and yellow checkerboard.

20140706-215803-79083579.jpg

The checkerboard design was not perfect. If I had to do it again and I had time, I might try the traditional way. The frosting was overly sweet but little children don’t mind 🙂

Little Mermaid Birthday Cake

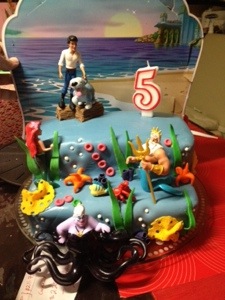
So Little M turned 5 this year and had been asking for a princess cake since her last birthday. After her Dora cake disaster (cake was bought raw in the center), I was not going to buy the cake.
She picked Little Mermaid as her princess and decided she wanted “under the sea” version.

20140424-173506.jpg

I wasn’t feeling confident enough to make the figurines so they are plastic toys made by Mattel.

I did, however make the coral, leaves and flowers. The cake itself is my usual butter cake. It is easy and, so far, not failed me.
The sea was supposed to be blue but I wanted it a darker colour where sea witch Ursula is. Similar to skinner blend method in polymer clay. I must not have watched enough YouTube because my fondant became too narrow to use on the whole cake. I was running out of fondant so I just mixed both blue together and got this greyish looking blue. Which looks alright I suppose.

For the decorations, I used Sugar Creations work as an inspiration. I used the back of chopsticks to make those flat pink corals and folded purple ones on the front tip of the chopsticks. For the yellow cheese like ones, I had seen a video where a lady made coral rock. She used drinking straw to make the holes then use a bunch of toothpicks tied together to stamp all over it to give it texture.

20140424-175343.jpg

20140424-175401.jpg

The decorations were made a few weeks in advance. Made with marshmallow fondant, they weren’t stiff and just perfect for the kids to pick those first and eat them.

Even before the candle was lit, the kids attacked the cake.

20140424-175743.jpg

Red Velvet Cheesecake

I have been on a baking break for the duration of Lent.
This was my last bake and Oh! What a way to finish off.

20140409-081905.jpg

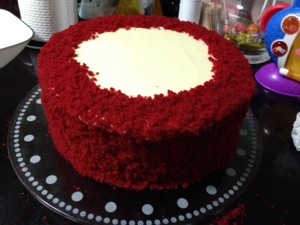
The recipe and picture was shared on Facebook by a friend and I immediately wanted to try it. I searched for the original post and found it at Recipe Girl.

The recipe uses American measurements so I had to change some to Australian but otherwise, I did not make any other changes.

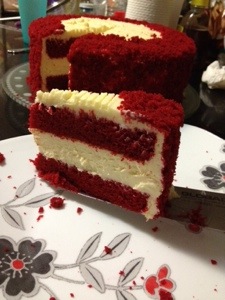
The cake was delicious. The cheesecake in between the baked cake cut the richness of the cheesecake.

A lot of comments on Facebook were about the amount of red colour. If commercially produced colour is not your cup of tea then use 1/4 cup of beetroot juice.

20140409-082739.jpg

We shared half the cake at work 🙂

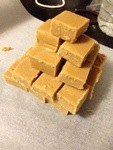
Christmas Cooking – Creamy Fudge

It’s been a while and I have a lot if catching up to do. My eldest has started school and life has become very busy.

Anyway, here is one of the goodies in our Christmas bag this year. We make/ bake things to give. Past years, we have been baking some nice but time consuming cookies. So for Christmas 2013, I wanted it quick but still yummy.

20140408-173537.jpg

Recipe curtesy of December 2013 Better Home and Garden Australia issue.
This is in Australian measurement so I have converted it in ounces in ( ). Our Tbsp is 4 tsp while American one is 3tsp so I have added the extra that is needed in ( ).

1 cup (8.8 oz) firmly packed brown sugar
395g can (13.9 oz) sweetened condensed milk
100g (3.5 oz) butter chopped
1/4 cup (2.2 oz) maple syrup
2 Tbsp ( 2tbsp + 2tsp) liquid glucose (corn syrup)
200g (7 oz) good quality white chocolate roughly chopped.

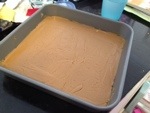
1. Grease a 19cm (7.8 in) square cake tin with cooking oil spray and line with baking paper. Put sugar, condensed milk, butter, maple syrup and liquid glucose in a deep saucepan over medium low heat. Stir for 8 minutes or until sugar dissolves and the mixture comes to boil. Continue stirring for 15 minutes or until mixture turns a rich caramel colour.

2. Remove from heat and add chocolate. Stir until melted and smooth. Pour fudge into prepared tin and spread evenly. Set aside to cool for 1 hour, then cover with plastic wrap and refrigerate for 2 hours or until set. Remove fudge from tin and remove baking paper. Cut into square pieces and Serve, or arrange in a gift box, tying a few pieces with coloured ribbon.

Note: I used dark brown sugar. It has a stronger flavour.
In Australia, the pure maple syrup we get are the pancake grades but my Mom brought us 2 different grades. The darker the grade, the more maple flavour you will get so I think the darkest is grade B. I used Grade A medium Amber.

20140408-173733.jpg

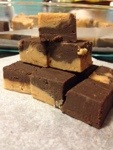
I made a second batch and made a marble one. So half the mix had dark chocolate and half the mix had white chocolate.

20140408-173932.jpg

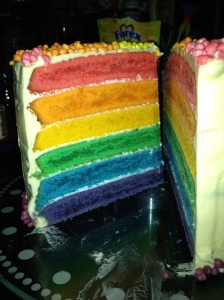
Nerds Rainbow Cake

Rainbow Cake

Rainbow Cake

I had been seeing a lot of these rainbow cakes and wanted to try it.

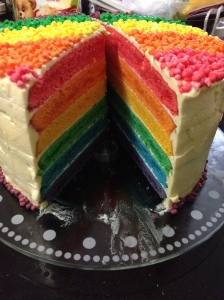
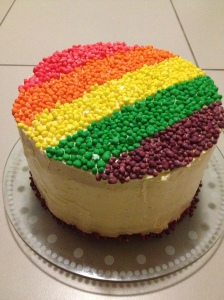
So here is my attempt, Nerds Rainbow Cake.

The cake mixture is my white chocolate mud cake. If I would have to bake it again, I would use a lighter cake, like a sponge maybe. Mud cake is heavy and if there are so many layers of cake, then you’d need something lighter. I did try to make each layer thinner as I did not want a very high cake. Rainbow does have 7 colours but I don’t know how to make indigo.

Cake Slice

Cake Slice

I think I made triple the batch that I usually make, then used a weighing machine to divide the mixture in 6 bowls And added icing gel to the bowls. I then used my Wilton checker board kit pans (there are 3 x 9″ pans in the kit) to bake the cakes.

The frosting is classic butter cream that was left over from the white forest cake in July.

My husband had bought a pack of mix nerds which my daughter and I separated into individuals colours before putting them on the cake.

Half of this went with us to church the next day.

Nerds Decoration

Nerds Decoration

Paleo Cafe, Cairns

Paleo Cafe, Cairns

Paleo Cafe, Cairns

We visited Cairns, Australia for our annual holidays this year. In the northern tropics of the state of Queensland, it was nice and warm during what is typically winter in southern Queensland. We all were walking around in shorts and t-shirts. Our must have thing during this holiday was gelato. There was a shop on almost every street.

Beside our hotel we also found this little gem. Paleo Cafe. The best thing was that they had gluten free. I’m not into healthy clean living, I eat what I crave and that’s normally cake, but my Mom is gluten intolerant and we had such a hard time eating out in Brisbane during her visit. When I saw this cafe, beside a French patisserie and across a Swiss cake shop, I was surprised.
Brisbane has a larger population but we don’t have a dedicated cafe like this here. Hmmmm…